How To Apply Blush For A Natural, Radiant Glow
Ever looked in the mirror after putting on blush and thought, “Why do I look like I’m auditioning for a stage play?” You’re not alone. A lot of people either skip blush altogether or overdo it. But when done right, blush can make your face look healthier, fresher, and more awake. The key? Knowing where to place it and what works for your skin tone and face shape. Let's break it down so you can nail that natural, radiant look without second-guessing yourself.
Start With The Right Shade
The biggest reason blush looks off isn’t how you apply it—it’s the shade. Think of your natural flush after a walk in the sun or a few minutes of laughing. That’s what you want to match.
If your skin is fair, look for soft pinks or peach. They mimic that gentle, warm flush that’s subtle but noticeable. Medium skin tones can go for deeper pinks, apricot, or rose. For olive skin, try warm tones like tangerine or golden hues. Deeper complexions shine with berry, plum, or warm brick shades.
Cream blushes usually blend more seamlessly into the skin, while powder blush gives a bit more staying power. Gels and liquids? Those are great for a dewy finish, especially if your skin is on the dry side.
No matter what you pick, swatch it on your cheekbone and blend. If it looks like it's part of your skin and not sitting on top of it, that's your shade.
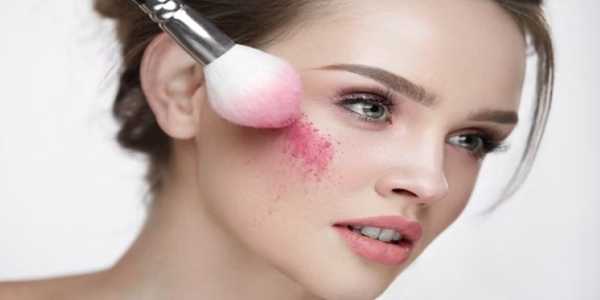
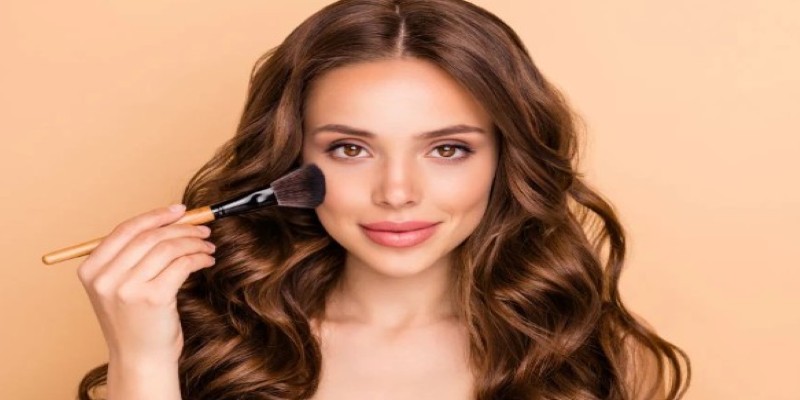
Tools Matter (But Not As Much As You Think)
It’s easy to get overwhelmed with brushes, sponges, and fingers, especially when beauty counters try to sell you three different blush tools. Here's the truth: use what you're comfortable with. Each tool gives a slightly different result, and it all depends on the finish you want.
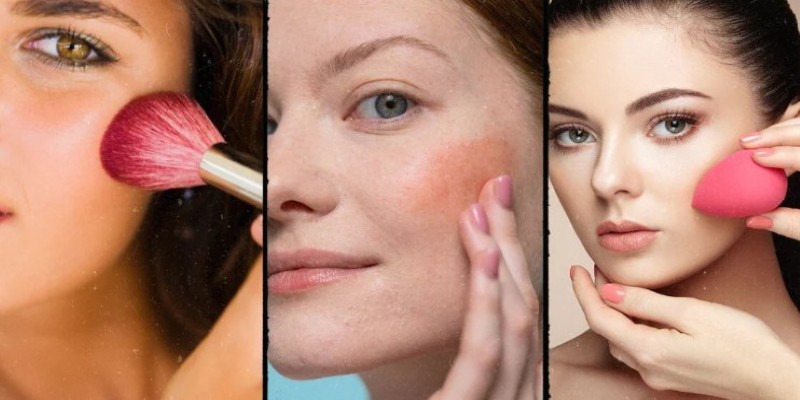
Brushes give you a diffused, soft wash of color. If you're using a powder blush, go with a fluffy brush with soft bristles. Angle brushes help you control placement, especially along cheekbones.
Creams and sticks? Your fingers work just fine. The warmth helps blend the product into your skin. Tap—don’t rub. Rubbing can move your foundation or make the blush patchy.
Sponges are best for liquid or gel blush. They help sheer out the color and press it into the skin, leaving a smooth finish.
You don’t need a drawer full of tools. Just one or two that do the job well and fit your makeup routine.
Placement Changes Everything
Here’s where most people go wrong. They apply blush like they’re painting circles on their cheeks. But real blush doesn’t sit in one spot—it melts naturally across the face.
The classic advice is to smile and place blush on the apples of your cheeks. That works for many, but not everyone. If you have a round face, that placement might make your face look even rounder. Instead, blend the blush slightly higher, along the top of your cheekbone, and angle it upward toward your temple. It gives a lifted effect.
For heart-shaped faces, keep blush lower and closer to the center of the face. This balances a wider forehead. Square faces? Apply it in a soft C-shape from the cheek to the brow bone.
You're not stuck with one method. Try it out. See how your face changes when you tweak the angle or blend just a little further. The goal is to bring life to your face, not to mimic a trend that doesn't suit your structure.
Layering Is The Secret To A Natural Look
Think about how color shows up on your skin when you naturally flush—it’s never one strong stripe. That’s why layering is so important. Start with a tiny amount. You can always add more. Taking away is harder.
A good trick is to apply a cream blush first, then set it with a matching powder blush. This not only locks in the color but also makes it look like it’s coming from within your skin.
If your blush feels too strong after applying, go over it with your foundation brush (without adding more product). It’ll soften the edges and make it look more blended.
Want a sun-kissed effect? Lightly dust blush across your nose bridge. This small step mimics how the sun naturally hits your face and gives a subtle, youthful vibe.
Match It With The Rest Of Your Makeup
Ever noticed that your blush looks off even though you used the right shade and applied it carefully? The rest of your makeup could be throwing it off. Your blush has to tie in with your lip color and overall look.
If you're going for a bare-face look with tinted moisturizer and clear gloss, a soft, sheer blush works better than a bold one. But if you're wearing a red lip or a strong smoky eye, you can go a bit deeper with blush, but keep it balanced.
A common combo: peach blush + nude lips + brown mascara. Another great one is rose blush + pinky-nude lipstick + brushed brows. These subtle pairings pull the look together.
If you’re doing no-makeup makeup, your blush should almost blend into your skin. That’s where cream and liquid formulas shine. If you’re going glam, that’s when powder blush with a defined contour works better.
How Long Does It Last?
That depends on your skin type and product choice. Cream and liquid blushes may fade faster on oily skin but last well on drier types. Powders tend to last longer, especially if applied over a set foundation.
A setting spray can help lock in your whole makeup, blush included. Or, you can carry a small stick blush in your bag for touch-ups. Reapplying blush is faster than redoing your whole face, and it can bring back that just-applied freshness mid-day.
Practice Makes Blush Perfect
Don’t expect perfection the first time. The more you experiment, the more you learn what works for you. Try blush on bare skin to see how it blends. Test it on different foundations. Change your placement depending on your mood, outfit, or even the lighting outside.
Blush isn’t a rigid rule—it’s flexible. It adapts. And that’s the beauty of it.
Radiance That Looks Like You Woke Up Like This
A good blush job doesn’t scream “makeup”—it just makes you look better. Healthier. More awake. When it’s right, you don’t notice the blush—you notice the glow.
Whether you prefer peach tones on the cheeks or deeper rose shades, soft cream finishes or bold powders, the secret lies in subtlety and knowing your face. Keep it light, blend it well, and let your natural features do the talking. A little color goes a long way—when it’s in the right place.